Welcome to TNW Basics, a collection of tips, guides, and advice on how to easily get the most out of your gadgets, apps, and other stuff.
Shortcuts app for iOS is a very useful way to automate your iPhone or iPad. In this series, we’ve been looking at different workflows to make your Apple device a lot more powerful to accomplish specific tasks. Another automation that could come in handy is removing metadata from photos.
Every photo that you take with your phone (or any camera) comes with a lot of technical information. They might include details like:
- Data and time the photo was taken
- Latitude and longitude coordinates for the location where the photo was taken
- Camera manufacturer and model
- Camera settings like ISO speed, shutter speed, focal length, aperture, white balance, and lens type
- Name of programs used to edit the photo
- Pixel resolution
This information — called EXIF (short for Exchangeable Image File Format) data — is useful for photographers to determine how a photo was composed. But geotagged photos can also give away the location of your whereabouts to internet strangers if they stumble across your photos on social media.
So, it’s always a safe practice to strip your photos of sensitive EXIF data before sharing it elsewhere. Here’s how to do this using Apple’s Shortcuts app.
Disclaimer: The screenshots below correspond to Shortcuts app for iOS 13 Beta 2. But the steps you need to follow are exactly the same.
Step #1: Download the Shortcuts app from the App Store, if you haven’t done so already.
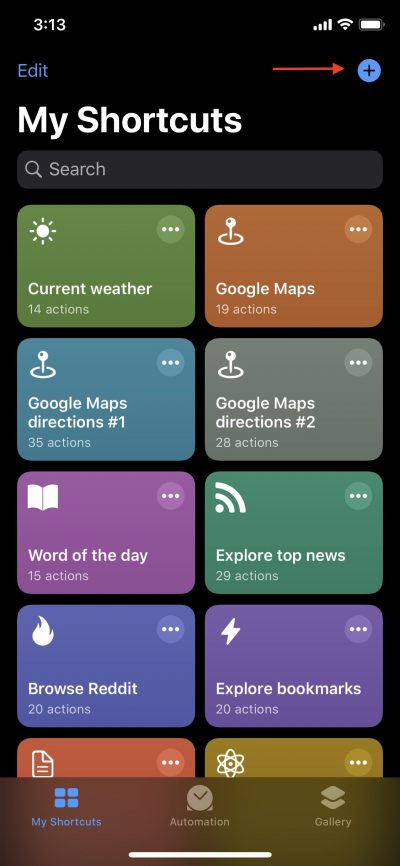
Step #2: Open the app, and in the My Shortcuts (Library in iOS 12) tab, hit “+” on top to create a new shortcut.
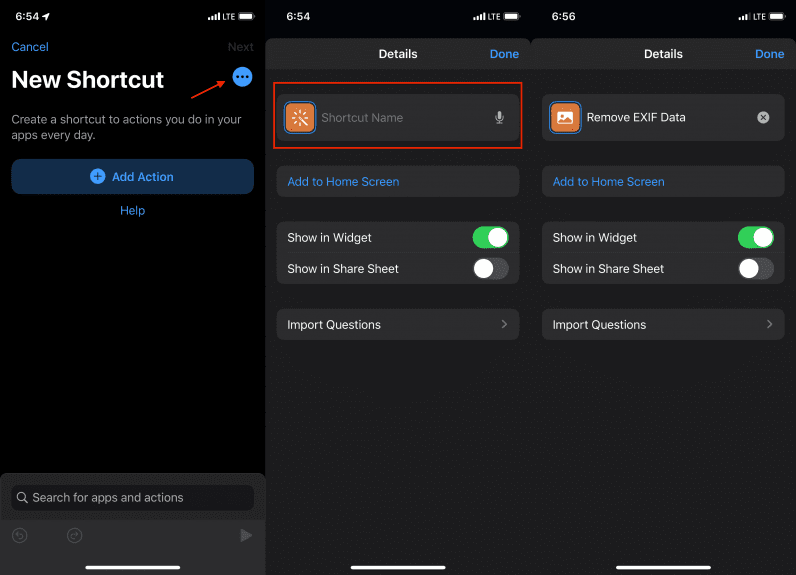
Step #3: Tap the “Settings” icon, and give the shortcut a name, for example, “Remove EXIF data.” You can also tap the “Icon” to change it to something that matches your shortcut’s function better.
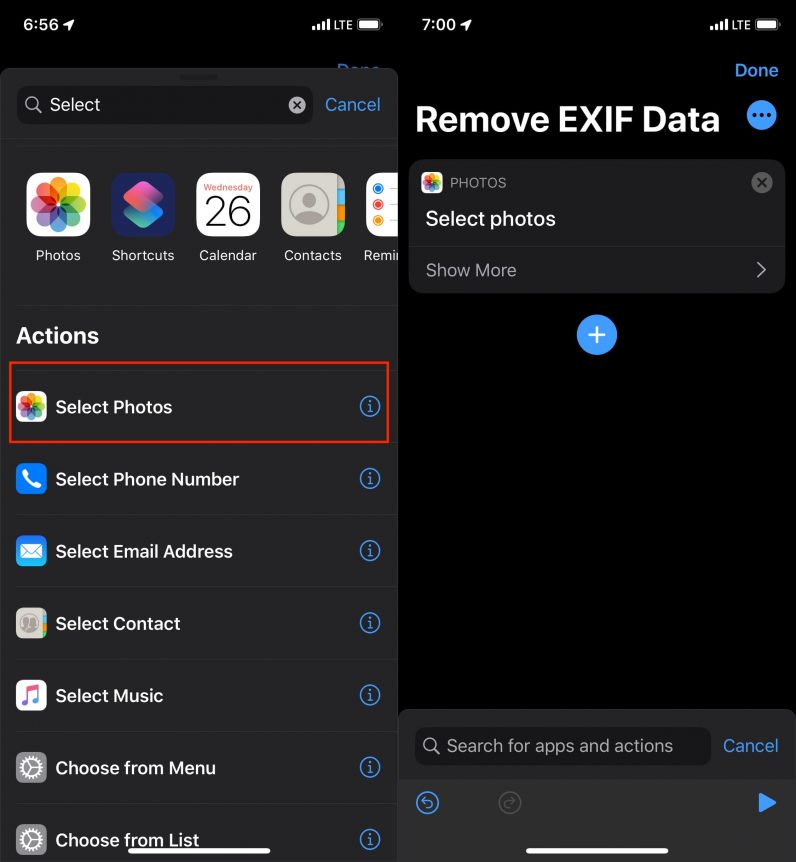
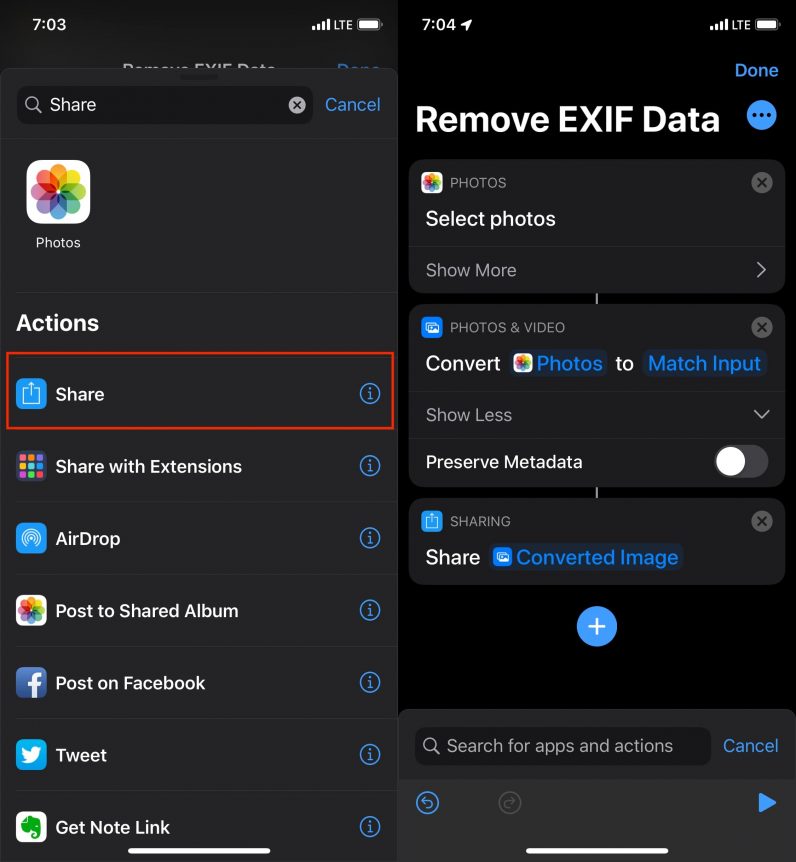
Step #4: The first step is to select the desired photo. You can do this by adding the “Select Photos” action. (Note: When you run the shortcut, you will be prompted to request access to Photos app. Ensure you allow access.)
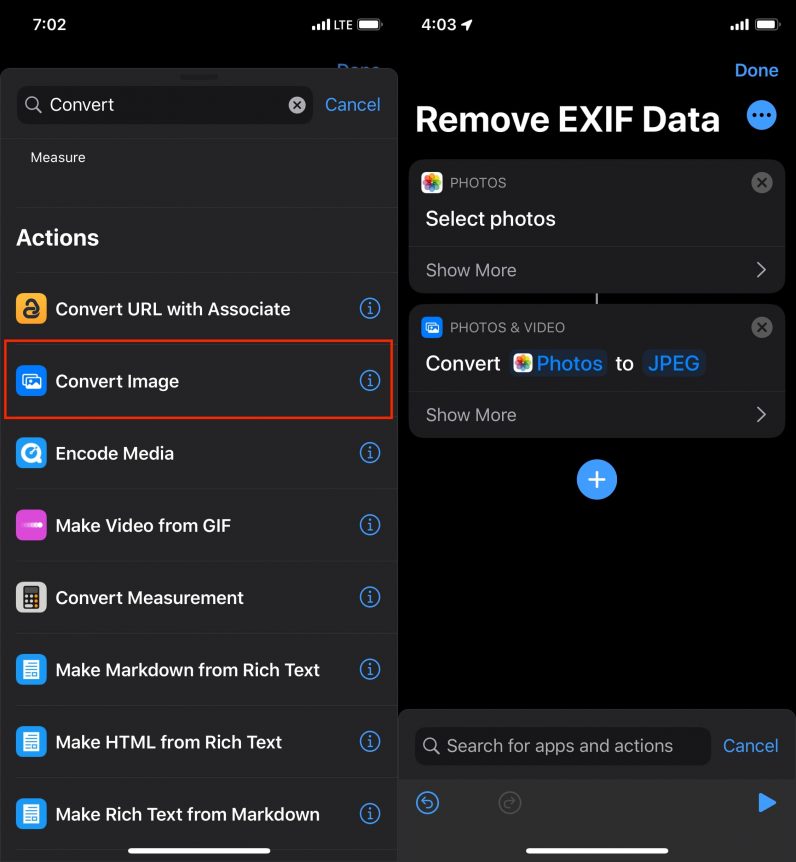
Step #5: As a next step, add “Convert Image” action. This will allow you to convert the image to any desired format with an additional option to remove EXIF data.
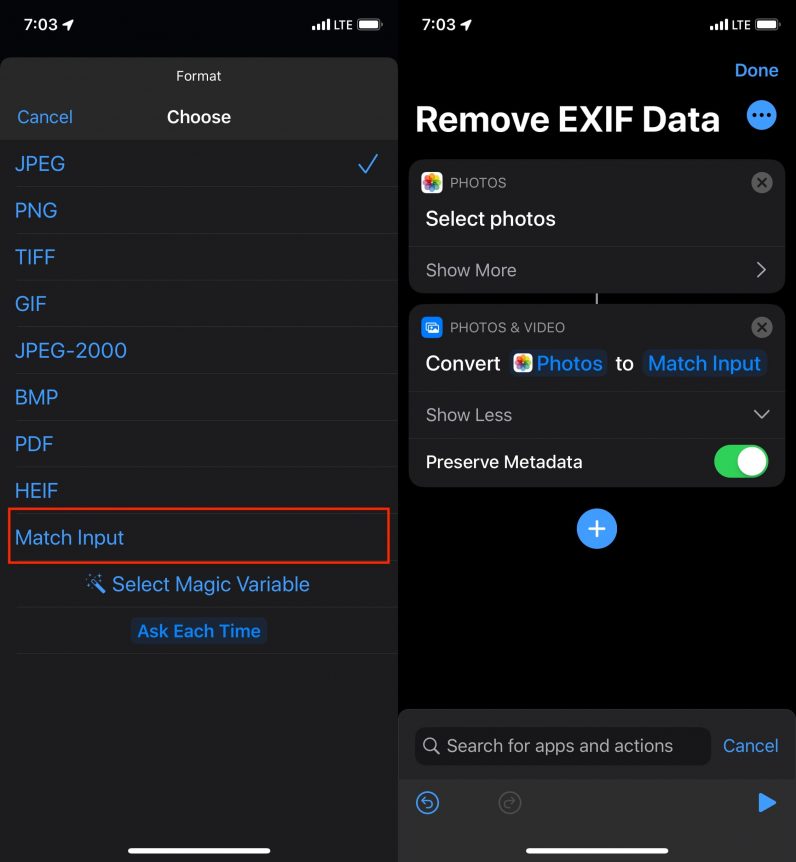
Step #6: By default the “Convert Image” action will convert the image’s format from .PNG to .JPEG. But since our intention is to just remove EXIF data, select the target format as “Match Input.” This will retain the output image format to match the input.
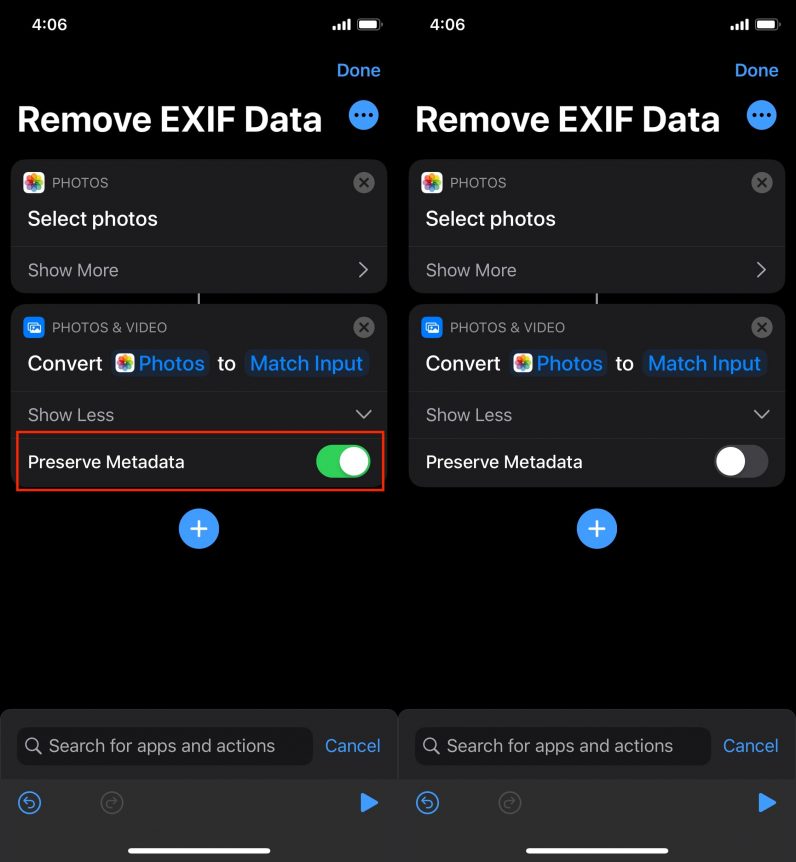
Step #7: Remove the EXIF data associated with the photo by turning off the option “Preserve Metadata.”
Step #8: The next step is to share the photo without the EXIF data. This can be done by adding a “Share” action. This will open up the Share Sheet when you run the shortcut.
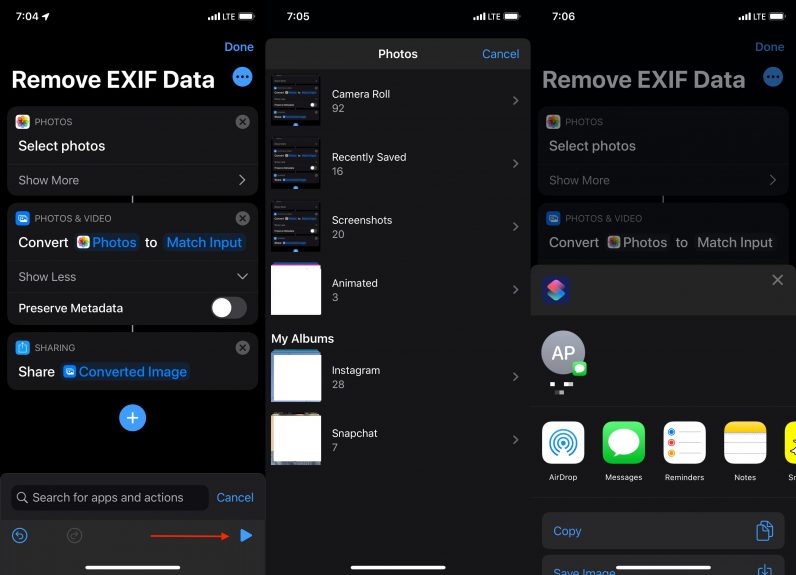
Step #9: The shortcut is complete. You can now run it by hitting the “Play” button. In iOS 12, it’s located on top. Upon running the shortcut, you’ll see an album view of the Photos, from which you need to select a photo. Once done, it will prompt you to share the converted photo without EXIF data.
For now, Shortcuts app is available only for the iPhone and iPad. But there are also rumors that the app will hit macOS later this year.
Get the TNW newsletter
Get the most important tech news in your inbox each week.
