Dark mode seems to be here to stay. Initially, it was mainly used by developers in their code editors. Now, it’s all over the place: mobile, desktops, and now even the web. Supporting dark mode is turning from a niche to a must-have. Of course, it depends on your niche. But if you are here, chances are you want to implement dark mode on your site or for your clients.
When it comes to dark mode for websites there are multiple approaches. In this post, I’ll be discussing two different approaches, with one being the easiest to implement, and the second being my preferred option and the option that I actually used to implement dark mode on livecodestream.dev .
Let’s get started with the first option.
Dark mode in a few lines of code
The first option works with the use of “dark” magic. Joke aside, it consists of one line of CSS.

What? You’re probably wondering how that could work, and you may be right to be skeptical, but it does indeed. Let’s see it in action before we talk about why I don’t like this option so much:
As can be seen in the example it works really well, but with an issue: it also inverts images. This happens because the filter property additionally applies to images, background, and borders. Now, this can be fixed easily by avoiding the change on images (or better said, by inverting the inversion):
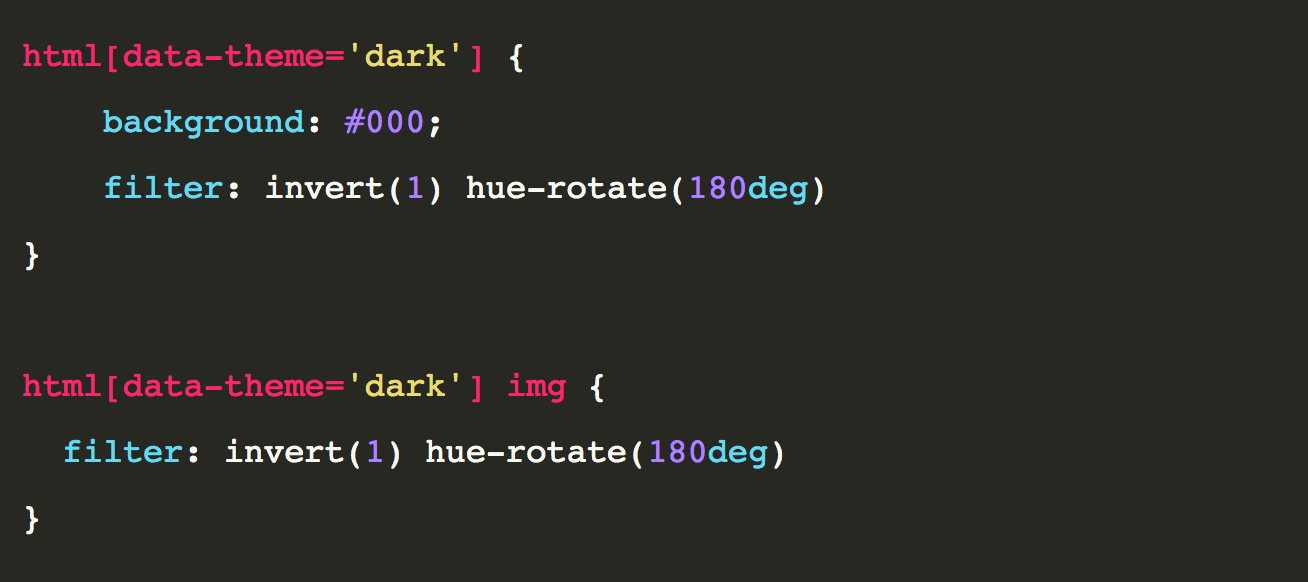
Nice! But everything transitions so abruptly. Let’s make it nicer with some transitions and colors here and there:
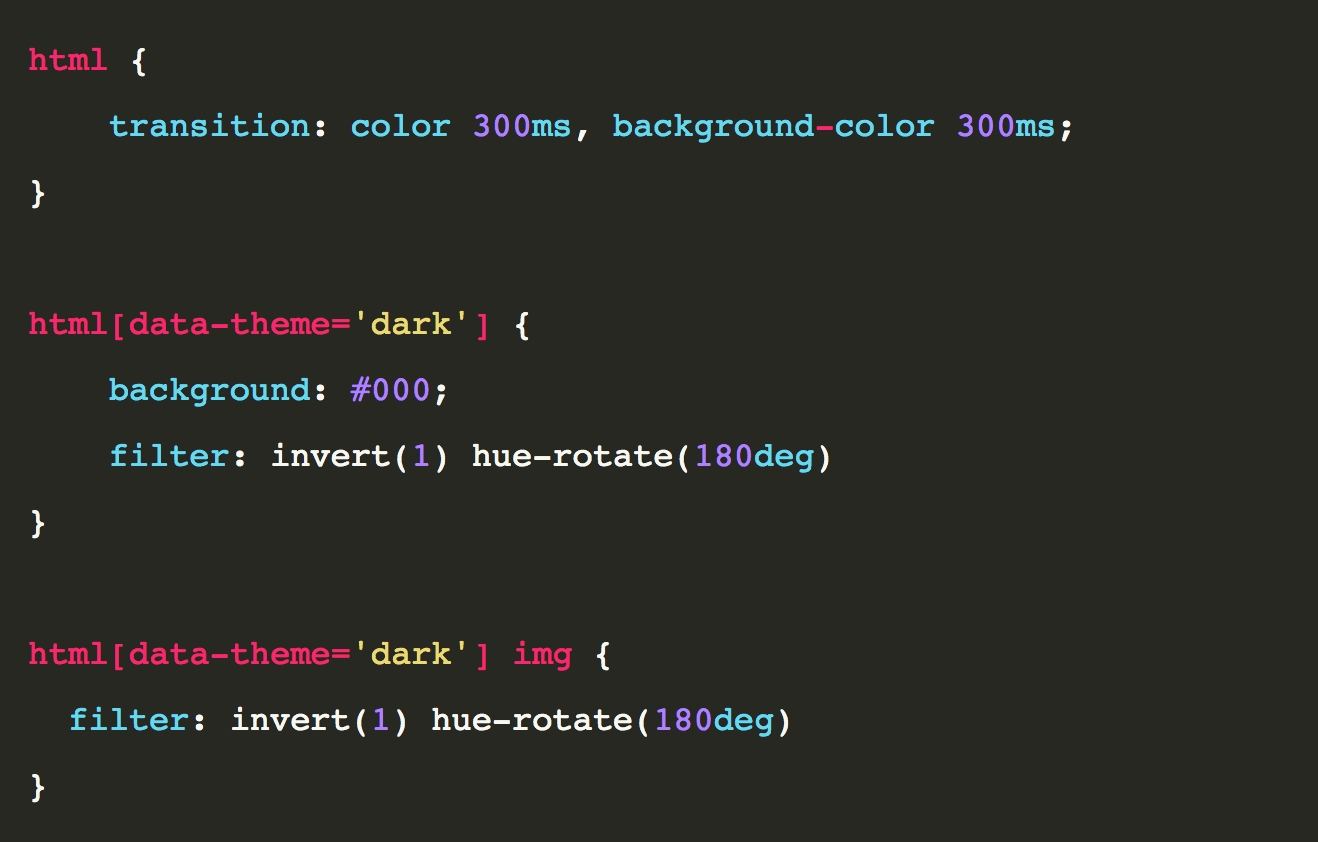
Done! Now, it won’t always look great. In some cases, it may look a bit strange, and we may want to have more control over each color.
Dark Mode with CSS variables
This is the technique I use on my website and it works pretty well. CSS allows the definition of custom properties (variables), which are entities that can be defined in CSS with specific values and reused throughout the website. You can find detailed information on the MDN docs. However, we will quickly review here how to create a variable and how to use it.
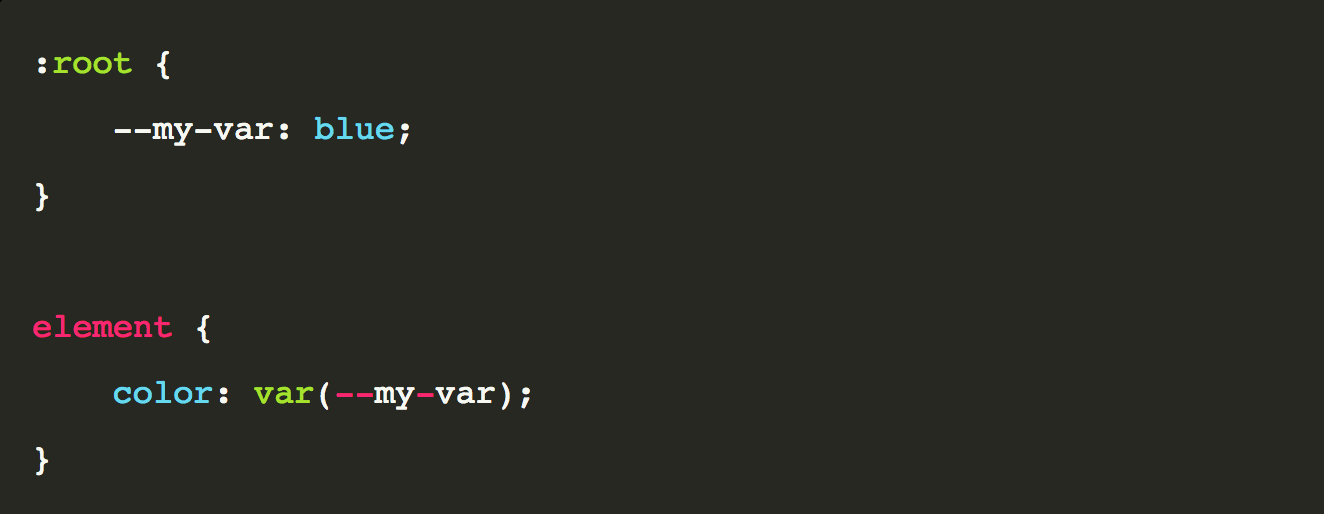
To name a variable we need to prepend -- to the variable name. And to use it, we make use of the function var().
Now let’s go back to our scenario and try to implement dark mode this way.
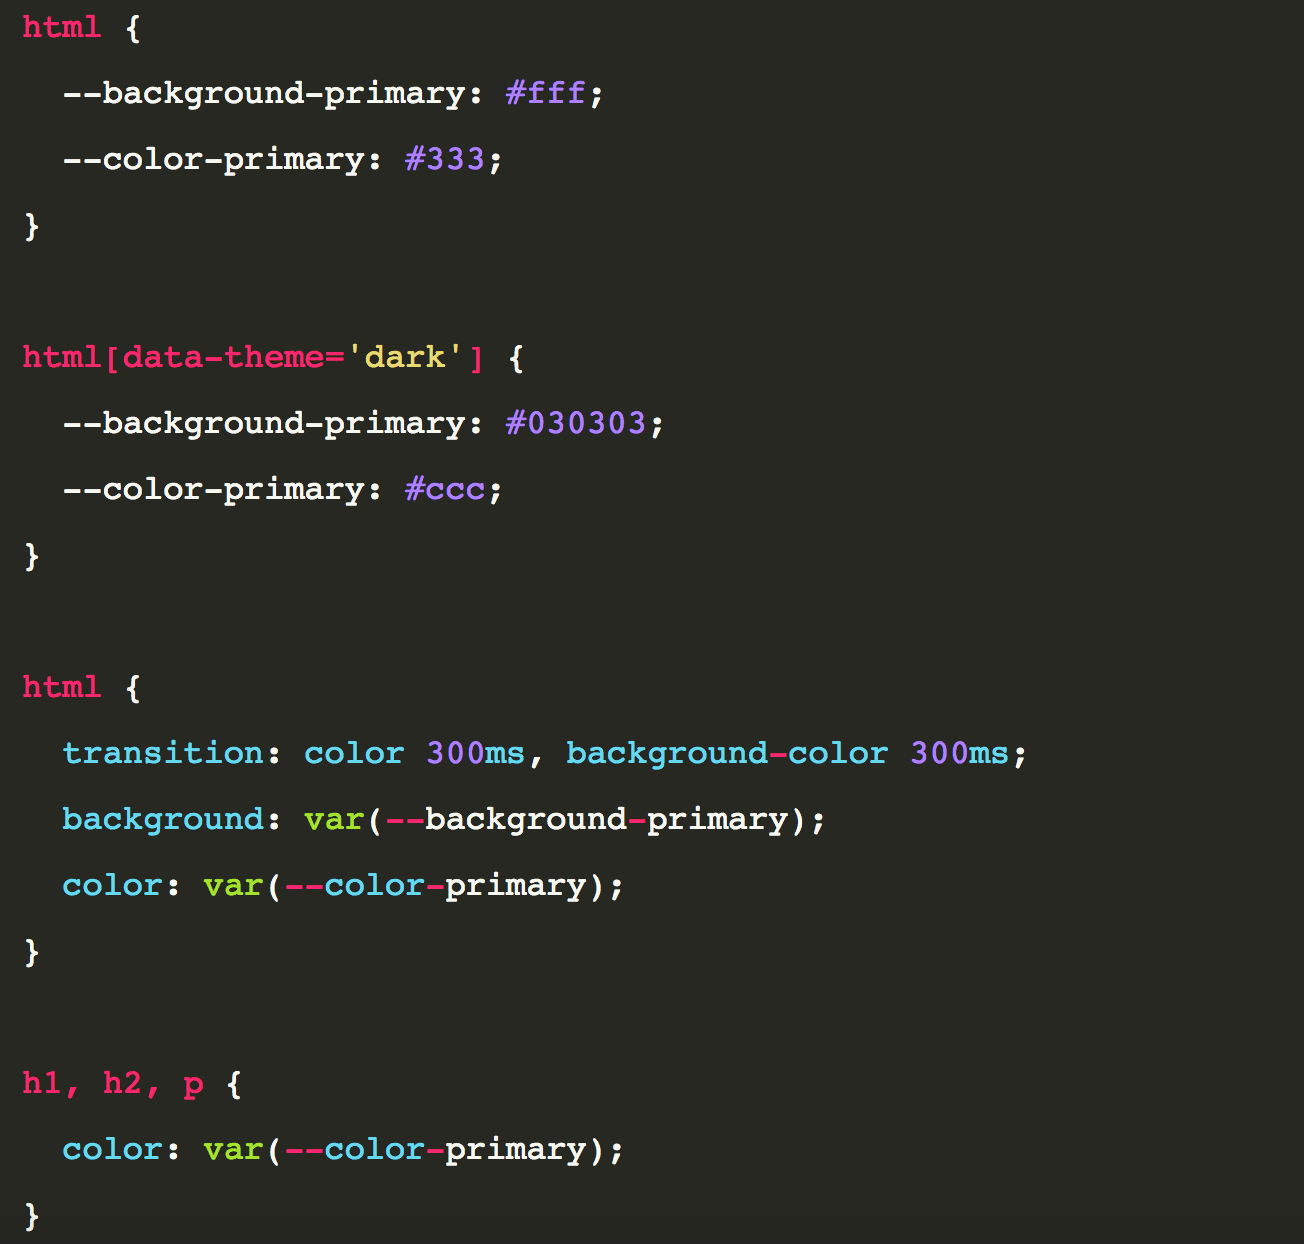
It’s much more cumbersome. Now, we need to assign to each element we use on our site the colors we want for text and background. Otherwise, it won’t work. But gives you full control over what’s happening, and you can create different variables for titles, buttons, callouts, you name it.
Let’s see this on a live example:
So far I have explained the CSS side of things, but we’ll also work on the JavaScript code to make the switch and even save it on local storage, so the next time the user enters the site we can remember his preference.
Theme toggle logic
Let’s now work on the JS that makes the switch possible. It is actually, again, very simple:

So, what did we do so far? The way the theme works is by applying a data attribute over the HTML element. For that, we need to capture the element in the variable htmlEl, and then we can finally have a function that receives a theme name and changes the attribute.
But we also want to make sure our changes are stored on the browser so that we remember the user preference for the next time he/she visits our site. For that, we will use the localStorage API.
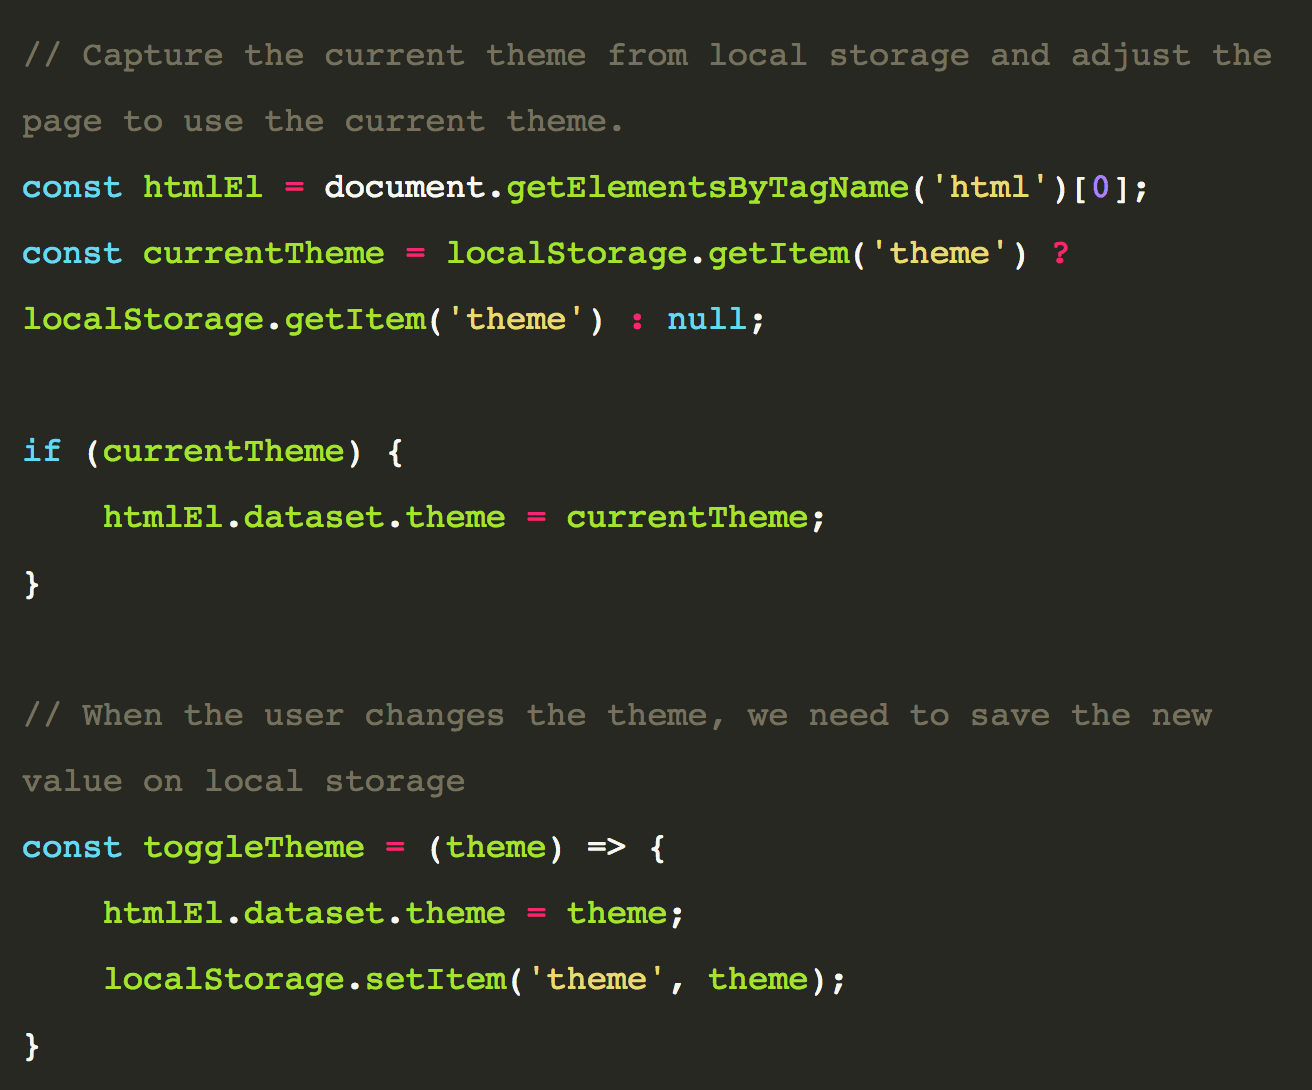
Done! Let’s see it live:
This article was originally published on Live Code Stream by Juan Cruz Martinez (twitter: @bajcmartinez), founder and publisher of Live Code Stream, entrepreneur, developer, author, speaker, and doer of things.
Live Code Stream is also available as a free weekly newsletter. Sign up for updates on everything related to programming, AI, and computer science in general.
Get the TNW newsletter
Get the most important tech news in your inbox each week.


